Friday, February 17, 2006
High Dynamic Range Photography with Linux
This experiment started with a BoingBoing entry on the Flickr HDR pool. Most of the images in the pool are created with the latest PhotoShop release. Me being a linux weenie, I looked around for how to do this under linux. I successed. Using my Sony DSC-V3 camera and a sunny morning, here are my first results:

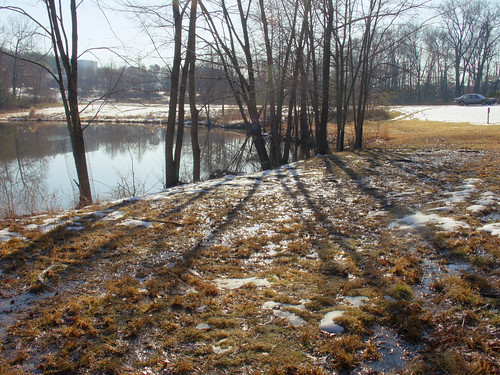
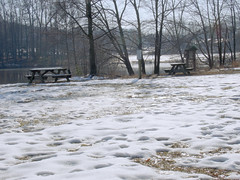
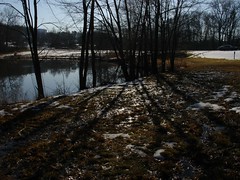
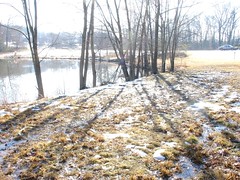
The bottom image, the resulting HDR image, was generated from 5 images, each one f-stop apart. The top two images show the shortest and longest exposures. The first shows the details of the foreground snow and the distant reflections of the trees in the water. But to capture this, the details of the trees at the water's edge are lost. The second image shows to capture the details of said trees, the exposure is so long that all reflections are lost and most of the snow is blocked.
To combine the 5 images, I used CinePaint. In particular, Hartmut Sbosny's Bracketed exposures to HDR plugin. The plugin solves for the luminosity response function, a method presented in the Debevec and Malik SIGGRAPH article Recovering High Dynamic Range Radiance Maps from Photographs. The result of this is an HDR image that can be saved in the OpenEXR format.
I was not happy with CinePaint's ability to adjust the exposure and gamma of the resulting image. After saving, I used pfstools' pv viewer. I used logarithmic scaling and selected the fit to range option. Then by saving, the HDR is converted to standard 8 bit per channel image. In my case, I saved as PNG. From there, Gimp allowed me to fine-tune the distribution of luminosity, along with the color balance.
Here is a second set of images:

My collection of HDR images at flickr.
[Update] Since writing this entry, I have developed a GUI for using pfstools's tone mapping operators. Please read qpfstmo: HDR Tone Mapping GUI for Linux for details.
 f/8 @ 1/640 |  f/8 @ 1/40 |

The bottom image, the resulting HDR image, was generated from 5 images, each one f-stop apart. The top two images show the shortest and longest exposures. The first shows the details of the foreground snow and the distant reflections of the trees in the water. But to capture this, the details of the trees at the water's edge are lost. The second image shows to capture the details of said trees, the exposure is so long that all reflections are lost and most of the snow is blocked.
To combine the 5 images, I used CinePaint. In particular, Hartmut Sbosny's Bracketed exposures to HDR plugin. The plugin solves for the luminosity response function, a method presented in the Debevec and Malik SIGGRAPH article Recovering High Dynamic Range Radiance Maps from Photographs. The result of this is an HDR image that can be saved in the OpenEXR format.
I was not happy with CinePaint's ability to adjust the exposure and gamma of the resulting image. After saving, I used pfstools' pv viewer. I used logarithmic scaling and selected the fit to range option. Then by saving, the HDR is converted to standard 8 bit per channel image. In my case, I saved as PNG. From there, Gimp allowed me to fine-tune the distribution of luminosity, along with the color balance.
 f/8 @ 1/800 |  f/8 @ 1/100 |

My collection of HDR images at flickr.
[Update] Since writing this entry, I have developed a GUI for using pfstools's tone mapping operators. Please read qpfstmo: HDR Tone Mapping GUI for Linux for details.
Comments:
<< Home
Hmm. Didn't know about pfstools. I put together a nip2/vips script to combine two differently exposed LDR images.
Thank you! This has been the most practical advice to getting started in HDR in linux. It looks like the real art starts in the tone mapping. Can you suggest any further reading to help me better understand tonemapping etc. I have been using all the pfstmo filters, but none produce an output nearly as good as photomatix or the example on Debevec (even using the reference monument image). This could (and is most likely to be) my own error.
THe greatest challeng I face is creating an image with full tonal range presented, with enough contrast such that it dosnt look flat or grey...
Thanks again!
THe greatest challeng I face is creating an image with full tonal range presented, with enough contrast such that it dosnt look flat or grey...
Thanks again!
Unfortunately you choose bad pictures to illustrate the benefits of HDR photography.... One of the picture is simply underexposed, the other is overexposed and we you "blend" the pictures and tone map it with HDR process, you basically obtain the picture you would have had if you had correctly chosen the exposure!
HDR is better explained with a picture of windows taken from inside a church for example...
Post a Comment
HDR is better explained with a picture of windows taken from inside a church for example...
<< Home


